HostEONS was launched on 8th May 2018, and today we’re thrilled to celebrate 7 incredible years of powering websites, applications, and businesses around the world.
From just a few servers to thousands of active VPS and hosting clients globally, it’s been a journey of reliability, value, and constant growth.
To mark our 7th Anniversary, we’re offering some of our best VPS deals ever — and you’re invited to join the celebration!
🥳 Special 7th Anniversary VPS Offers – Limited Time Only!
We are excited to bring you an exclusive limited-time deal on our EU-based VPS hosting in Paris & Frankfurt!Whether you need a high-performance server for your website, applications, or business, now is the perfect time to grab a powerful VPS at a discounted price!
🔥 What’s the Offer?
✅ Flat 20% Recurring Discount on all our EU VPS plans – use coupon “EU20” at checkout!
✅ Top-Tier Performance – Powered by Xeon Gold 6142 CPUs & NVMe Drives for unmatched speed!
✅ FREE 10 Gbps Port Upgrade (worth $5/month) – Simply open a support ticket after ordering!
✅ Save Even More on Annual Billing! – This 20% discount applies to all billing cycles, but if you pay annually, you can get up to 45% OFF!
• Our annual pricing already includes a 25% discount compared to monthly rates.
• With this 20% additional discount, your total savings add up to a massive 45% OFF! 🎉
🔹 Don’t miss out! This is the perfect opportunity to upgrade your hosting at an unbeatable price. Order now and enjoy blazing-fast performance with huge savings!
Have questions? Our support team is ready to assist you!
Forex trading requires speed, reliability, and uninterrupted connectivity to stay ahead in the market. This is why many traders prefer using VPS hosting for their trading platforms. In this guide, we’ll walk you through the steps to set up a Forex trading platform on a VPS with Hosteons.
Why Use VPS Hosting for Forex Trading?
Before diving into the setup process, let’s look at why VPS hosting is ideal for Forex trading:
Low Latency: VPS servers near broker data centers ensure faster execution of trades.
Uninterrupted Connectivity: With 99.9% uptime, VPS hosting keeps your platform running 24/7.
Enhanced Security: Your trading data is protected with enterprise-grade security features.
Flexibility and Scalability: Easily upgrade your resources as your trading volume grows.
Step 1: Choose the Right VPS Plan
Hosteons offers various VPS plans optimized for Forex trading. Look for the following:
Low latency: Choose a server location near your broker’s data center.
Reliable performance: Opt for Ryzen-based KVM VPS servers for high speed and reliability.
Backup options: Ensure your plan includes snapshot or backup features.
Step 2: Connect to Your VPS
Once you’ve purchased a VPS from Hosteons, connect to it using Remote Desktop Protocol (RDP)or SSH:
For Windows:
Open the Remote Desktop Connection tool.
Enter the VPS IP address and credentials provided by Hosteons.
For Mac or Linux:
Use an RDP client like Microsoft Remote Desktop or SSH for Linux systems.
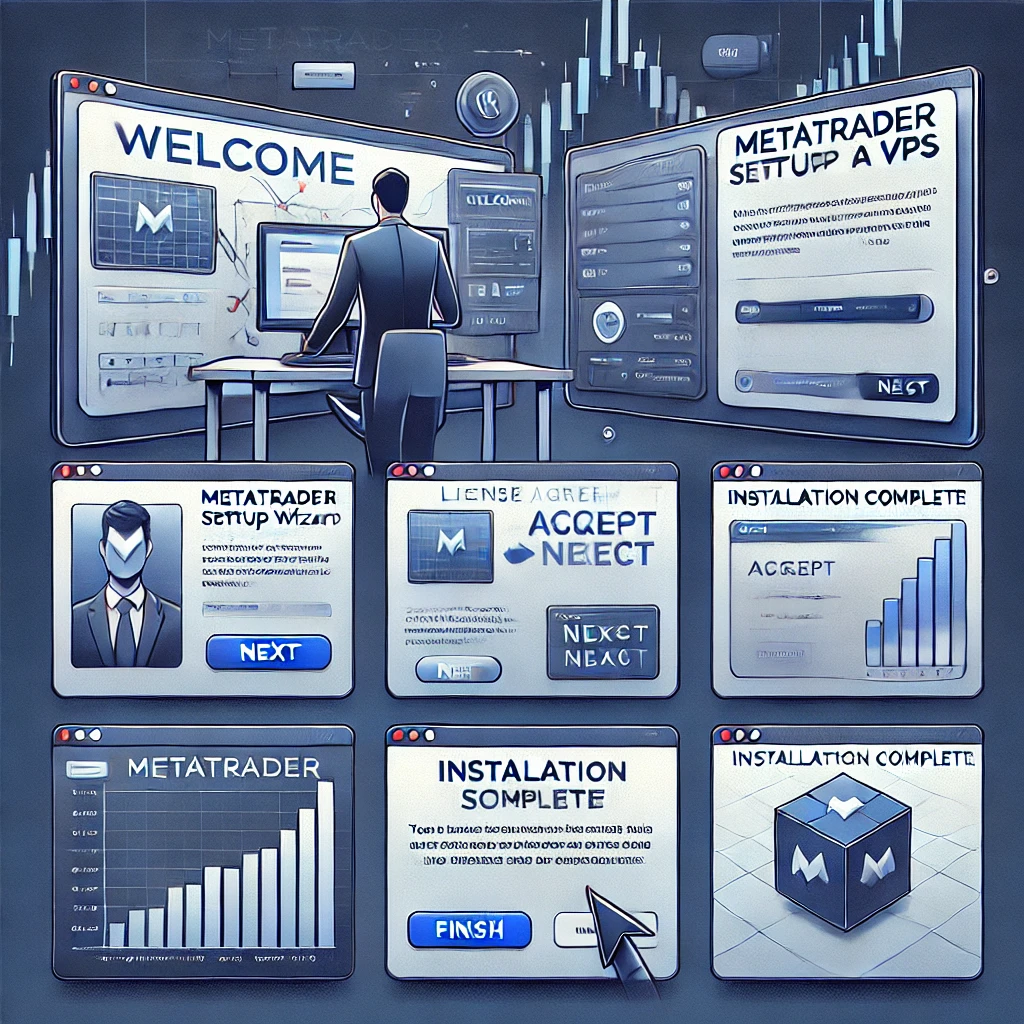
Step 3: Install Your Forex Trading Platform
Most traders use popular platforms like MetaTrader 4 (MT4) or MetaTrader 5 (MT5). Here’s how to install it:
Download the Platform:
Visit your broker’s website or the official MetaTrader site to download the trading platform.
Install on the VPS:
Run the installer and follow the on-screen instructions.
Login with Broker Details:
Use your broker-provided login credentials to access the trading interface.
Step 4: Optimize Your VPS for Forex Trading
To ensure your trading platform runs smoothly:
Adjust Resources: Allocate sufficient CPU and RAM for your platform.
Enable Auto-Start: Configure your trading software to start automatically after a reboot.
Update Software Regularly: Keep your VPS OS and trading software updated for maximum security.
Step 5: Test and Monitor
Once everything is set up:
Perform a test trade to ensure low latency and smooth execution.
Use Hosteons’ monitoring tools to track uptime and performance.
Set up alerts for unexpected downtimes or issues.
Benefits of Hosteons VPS for Forex Traders
Global Locations: Hosteons offers VPS hosting in key cities like New York, Frankfurt, and Los Angeles, ensuring low latency for major trading hubs.
Free Snapshots: Protect your data with free backups and snapshots.
24/7 Support: Dedicated support to resolve issues quickly.
Affordable Pricing: Get premium features at competitive prices.
Setting up a Forex trading platform on a VPS is a straightforward process with Hosteons. The benefits of speed, security, and reliability can significantly enhance your trading experience. Whether you’re a beginner or an experienced trader, Hosteons’ VPS plans are designed to meet your needs.
Get Started with Hosteons Today!
Ready to take your Forex trading to the next level? Explore our VPS hosting plans and enjoy a seamless trading experience.
When choosing a Virtual Private Server (VPS) for your hosting needs, it’s crucial to understand the different types available and why certain technologies outperform others. Here, we will dive into the various VPS types and highlight why KVM (Kernel-based Virtual Machine) stands out as the top choice. Additionally, we’ll explain why choosing Hosteons.com for your KVM VPS hosting is the best decision you can make.
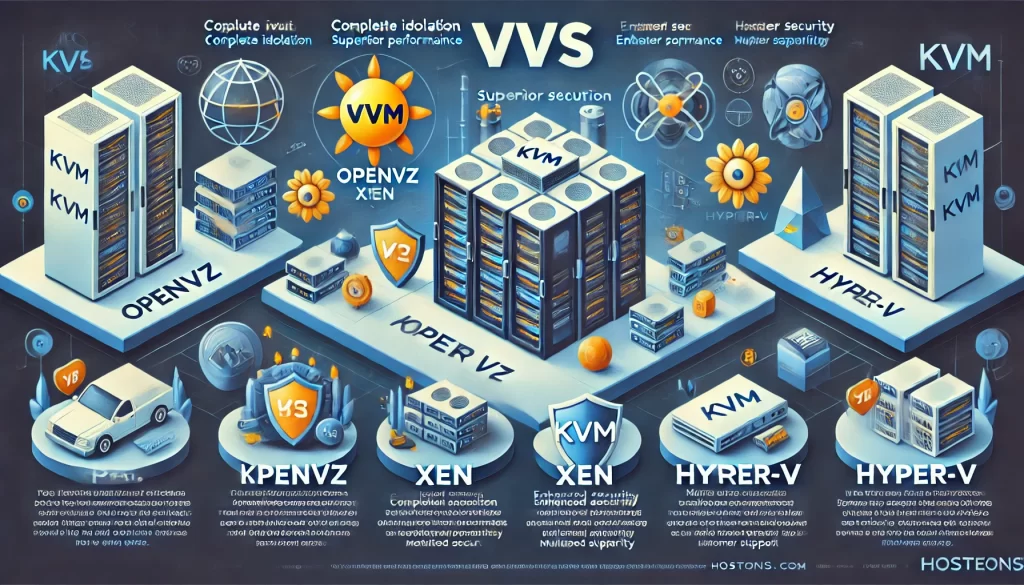
Different Types of VPS Hosting
OpenVZ VPS Hosting OpenVZ is a container-based virtualization technology for Linux. It allows multiple isolated operating system instances, or containers, to run on a single physical server. Each container shares the same operating system kernel but can operate independently.
Pros: Lightweight, fast provisioning, good for basic tasks.
Cons: Limited isolation, cannot run different kernels, lacks flexibility, prone to overselling of resources by some providers.
Xen VPS Hosting Xen is a hypervisor-based virtualization solution that offers more isolation compared to OpenVZ. With Xen, each VPS has its own kernel and can run various operating systems, providing greater flexibility.
Pros: Better isolation, supports different operating systems, stable performance.
Cons: Slightly more resource overhead compared to OpenVZ.
KVM VPS Hosting KVM (Kernel-based Virtual Machine) is a full virtualization solution that turns the Linux kernel into a hypervisor. It allows each VPS to operate independently with its own kernel, providing complete virtualization.
Pros: True virtualization, superior isolation, custom kernels, better security, full control over resources.
Cons: Slightly higher overhead due to full virtualization but offers superior performance.
Hyper-V VPS Hosting Hyper-V is Microsoft’s virtualization technology and is commonly used for Windows VPS hosting. It offers good support for Windows environments.
Pros: Best for Windows environments, good integration with Microsoft products.
Cons: Limited support for non-Windows operating systems, typically higher cost.
Why KVM is the Best Choice for VPS Hosting
1. Complete Isolation and Customization
KVM provides complete hardware virtualization, meaning each KVM VPS is fully isolated from the host node and other virtual servers. This isolation ensures greater security, stability, and privacy. Users have the freedom to run custom kernels and fully control their server environment, making it an excellent option for businesses and developers with specialized needs.
2. Superior Performance
Since KVM utilizes full virtualization, each VPS operates as its own server with dedicated resources. Unlike container-based virtualization solutions like OpenVZ, a KVM VPS is not subject to resource contention or “noisy neighbor” issues. This leads to consistent and predictable performance.
3. Enhanced Security
KVM’s isolation not only benefits performance but also provides stronger security. Each VPS has its own virtualized hardware, which makes it harder for attackers to compromise neighboring VPS instances. This level of security is essential for e-commerce sites, enterprise applications, and any environment requiring sensitive data protection.
4. Wide Operating System Compatibility
KVM supports a broad range of operating systems, including Linux distributions and even Windows. This flexibility makes KVM the ideal choice for users who require diverse software environments.
Why Choose Hosteons.com for Your KVM VPS
1. Powerful Hardware and Cutting-Edge Technology
Hosteons.com offers KVM VPS hosting on state-of-the-art Intel Xeon and Ryzen servers, ensuring top-tier performance and reliability. Our infrastructure is designed to handle the most demanding applications while maintaining excellent uptime.
2. Free Backup and Snapshots
We understand the importance of data security. That’s why we offer free backups and snapshots with our KVM VPS plans, allowing you to restore your data quickly in case of any issues.
3. Multiple Locations
Hosteons.com offers KVM VPS in multiple global locations, including Los Angeles, New York, Portland, Dallas, Miami, Salt Lake City, Frankfurt, and Paris. This allows you to choose a server location closest to your target audience, reducing latency and improving user experience.
4. 24/7 Customer Support
Our dedicated support team is available 24/7 to assist you with any technical issues or questions. We pride ourselves on fast response times and providing the best possible service to our clients.
5. Scalable and Affordable Plans
At Hosteons.com, we offer flexible and scalable KVM VPS plans that fit a variety of needs and budgets. Whether you’re a small business, developer, or enterprise, we have a plan that will work for you.
Conclusion
When it comes to choosing a VPS solution, KVM stands out for its superior isolation, performance, security, and flexibility. Coupled with Hosteons.com’s state-of-the-art hardware, robust infrastructure, and excellent customer support, it’s easy to see why we’re the preferred choice for KVM VPS hosting. Whether you need a powerful server for development, e-commerce, or any other application, we have you covered.
Explore our KVM VPS plans today and experience the Hosteons difference!
Windows Server 2022 is a robust operating system designed to power the most demanding enterprise applications, databases, and web servers. However, like all systems exposed to the internet, it’s a potential target for malicious actors. This guide will walk you through essential steps to ensure your Windows Server 2022 VPS or server remains secure, giving you peace of mind for your data and applications.
1. Update Windows Server Regularly
Keeping your server updated with the latest patches is crucial for security. Microsoft frequently releases updates to address vulnerabilities and bugs.
Open the Windows Update Settings:
Go to Settings > Update & Security > Windows Update.
Click Check for updates and install any available updates.
Tip: Consider enabling automatic updates to ensure your server stays current without manual intervention.
2. Secure Remote Desktop Protocol (RDP)
RDP is commonly targeted by attackers, so taking measures to protect it is essential.
Change the Default RDP Port: By default, RDP uses port 3389, making it a popular target.
Open Regedit and navigate to: HKEY_LOCAL_MACHINE\System\CurrentControlSet\Control\Terminal Server\WinStations\RDP-Tcp\PortNumber.
Change the port value to an alternative unused port number.
Limit RDP Access:
Use a firewall to allow RDP connections only from trusted IP addresses.
Consider using a VPN for RDP access, providing an additional layer of security.
3. Create Strong Password Policies
Using complex passwords and requiring periodic changes helps mitigate brute-force attacks.
Go to Group Policy Management: gpedit.msc.
Navigate to Computer Configuration > Windows Settings > Security Settings > Account Policies > Password Policy.
Configure settings such as minimum password length, complexity requirements, and password expiration.
4. Enable Windows Firewall
The built-in Windows Firewall is a powerful tool for filtering incoming and outgoing traffic.
Open Windows Defender Firewall and click on Advanced Settings.
Create inbound and outbound rules that allow only the necessary ports and applications.
Block any unnecessary connections that may pose a risk.
5. Configure User Account Control (UAC) and Least Privilege Access
UAC prompts users to confirm changes that require administrative privileges, limiting unauthorized system changes.
Go to Settings > Control Panel > User Accounts > Change User Account Control settings.
Ensure UAC is enabled.
For access control, create limited accounts for day-to-day tasks and use administrative accounts sparingly.
6. Install and Configure Antivirus Software
Protect your server from malware by installing a reputable antivirus solution. Microsoft Defender Antivirus, which is included in Windows Server 2022, is a good starting point.
Enable Real-time Protection: Regularly scan your system for threats.
Schedule Regular Scans: Configure the antivirus to automatically scan at regular intervals.
7. Regularly Backup Data
Having a solid backup strategy ensures your data remains safe in case of a security breach.
Configure Windows Server Backup:
Go to Server Manager > Add Roles and Features > Windows Server Backup.
Schedule regular backups, storing them offsite for additional security.
8. Disable Unnecessary Services and Features
Minimize your attack surface by disabling services you don’t need.
Open Server Manager, click on Manage, and select Remove Roles and Features.
Carefully review and deselect roles or features not required for your server’s operation.
9. Enable Network Level Authentication (NLA) for RDP
NLA adds an additional layer of security by requiring users to authenticate before a session is established.
Open System Properties > Remote Settings.
Under Remote Desktop, select Allow connections only from computers running Remote Desktop with Network Level Authentication (recommended).
10. Audit Security and Event Logs
Regularly review security logs to identify and respond to suspicious activity.
Go to Event Viewer > Windows Logs > Security.
Review logs for login attempts, access violations, or other suspicious activity.
Conclusion
Securing your Windows Server 2022 VPS or server requires a multi-layered approach. By following these best practices, you can greatly reduce your risk of cyberattacks, keep your data safe, and ensure that your server performs optimally. At Hosteons, we prioritize security and are here to support you every step of the way.
Securing your server is a critical task for any system administrator, developer, or business owner. AlmaLinux 9, as a stable and robust RHEL-based distribution, offers great tools and features that make it an excellent choice for hosting websites, applications, or services. In this tutorial, we’ll walk you through basic security measures you can implement to keep your AlmaLinux 9 server secure.
1. Update Your System
The first and foremost step in securing your system is ensuring that it’s up-to-date with the latest security patches.
Command:
sudo dnf update -y
This command updates all installed packages to their latest versions, closing any known vulnerabilities.
2. Create a Non-Root User
Running your system as the root user is risky, as any command executed with root privileges can make sweeping changes to the system. Instead, create a non-root user and use sudo for administrative tasks.
By following these basic security steps, you’re well on your way to securing your AlmaLinux 9 server. These measures provide a solid foundation for system hardening and mitigating potential threats. As always, security is an ongoing process, and regular audits and updates are crucial for long-term protection.
Feel free to share your own security tips or ask questions in the comments!
Securing your Ubuntu VPS is essential for protecting data, ensuring stability, and preventing unauthorized access. Here’s a straightforward guide on some basic yet effective steps to secure an Ubuntu VPS.
1. Update Your System
Start by updating your system to ensure all software is up-to-date with the latest security patches.
sudo apt update && sudo apt upgrade -y
2. Create a New User and Disable Root Login
For security, avoid using the root account directly and create a new user with sudo privileges.
Create a new user: sudo adduser yourusername
Add the user to the sudo group: sudo usermod -aG sudo yourusername
Switch to the new user: su - yourusername
Disable root login by editing the SSH configuration file: sudo nano /etc/ssh/sshd_config Find the line:
PermitRootLogin yes
Change it to:
PermitRootLogin no
Restart SSH to apply changes: sudo systemctl restart ssh
3. Enable Firewall (UFW)
Ubuntu’s Uncomplicated Firewall (UFW) provides a straightforward way to manage firewall settings.
Allow SSH access: sudo ufw allow OpenSSH
Enable the firewall: sudo ufw enable
Check the status: sudo ufw status
Optionally, if you’re hosting a web server, allow HTTP and HTTPS traffic:
sudo ufw allow http
sudo ufw allow https
4. Change the Default SSH Port
Changing the SSH port can add an additional layer of security against automated attacks.
Open the SSH configuration file: sudo nano /etc/ssh/sshd_config
Find the line: #Port 22 Uncomment and change 22 to your desired port, e.g., 2222: Port 2222
Restart SSH to apply changes: sudo systemctl restart ssh
Don’t forget to allow the new SSH port through the firewall: bash sudo ufw allow 2222/tcp
5. Disable Password Authentication and Enable SSH Key Authentication
Using SSH keys instead of passwords enhances security.
Generate an SSH key pair on your local machine: ssh-keygen -t rsa -b 4096
Copy your public key to your VPS: ssh-copy-id -p 2222 yourusername@your_server_ip
Disable password authentication for SSH: sudo nano /etc/ssh/sshd_config Find the line: PasswordAuthentication yes Change it to: PasswordAuthentication no
Restart SSH: sudo systemctl restart ssh
6. Install Fail2ban
Fail2ban monitors login attempts and blocks IPs with repeated failures, protecting against brute-force attacks.
Always keep regular backups to quickly recover in case of an attack or data loss. Many hosting providers, like Hosteons, offer backup solutions, making it easy to automate and restore from snapshots or backups.
Summary
By following these steps, you enhance the security of your Ubuntu VPS against common threats. Regular updates, secure login configurations, a robust firewall, and monitoring tools like Fail2ban all contribute to a safer and more reliable server environment. With these basics covered, your VPS will be better protected against potential attacks.
In today’s digital landscape, data is the backbone of any online presence, whether you’re managing a personal blog, an eCommerce website, or a mission-critical application. For VPS (Virtual Private Server) users, ensuring that data is safe, secure, and recoverable is more than just a precaution—it’s essential for maintaining uptime, protecting business continuity, and safeguarding user trust. At Hosteons, we understand this need, which is why we offer free backups and snapshots with our VPS and Hybrid Dedicated Server hosting. Here’s why having regular backups is vital and how Hosteons is here to support you.
Why Are Backups Essential for VPS Hosting?
Data Protection Against Cyber Threats Cyberattacks and ransomware threats are on the rise, and VPS servers are a prime target for malicious actors. Regular backups can safeguard your data, allowing you to recover quickly in case of an attack. With Hosteons’ free backup services, your data remains protected without additional cost, ensuring your digital assets are always safe.
Minimizing Downtime and Recovery Time For websites or applications, downtime is detrimental—not only for revenue but also for user trust. Backups allow for quick recovery in the event of server failures, data corruption, or accidental deletions, reducing downtime significantly. Hosteons’ backup solutions are designed to minimize the time needed to restore operations, keeping your business running smoothly.
Testing and Development Many developers and IT teams use VPS environments for testing and development. Regular backups allow you to restore your server to a previous state, making it easy to troubleshoot, test configurations, or revert changes without risk.
Compliance and Data Integrity Depending on your industry, you may need to retain certain data for legal or compliance reasons. Backups offer a simple way to ensure data is maintained securely, helping your business meet regulatory requirements.
Hosteons.com Backup and Snapshot Solutions
At Hosteons, we pride ourselves on providing high-quality hosting solutions that prioritize user needs. Our budget US KVM VPS and EU KVM VPS hosting (powered by Intel Xeon servers) and premium Ryzen KVM VPS servers are designed with performance and reliability in mind. For those needing a more robust solution, we offer Hybrid Servers (VDS) on Ryzen 7950x servers. With data center locations in Los Angeles, New York, Portland, Dallas, Miami, Salt Lake City, Frankfurt, and Paris, you can select a location that suits your audience best, all while enjoying 24×7 support.
With our free backup and snapshot service, you can rest easy knowing that you can roll back your VPS to a previous state whenever you need it. Whether you’re a small business or a large enterprise, this feature adds an invaluable layer of security and flexibility to your hosting experience.
Hosteons: Reliable Hosting with Free Backups
When you choose Hosteons, you’re choosing more than just a VPS provider—you’re partnering with a company dedicated to your digital success. From shared and reseller web hosting to hybrid dedicated servers, Hosteons ensures that your data is protected with regular, accessible backups. Let us handle the technical challenges, so you can focus on what you do best.
Start your journey with Hosteons today, and experience the peace of mind that comes with knowing your data is always secure and recoverable.