WordPress powers more than 40% of all websites worldwide. From small blogs to enterprise websites, it’s the go-to platform for flexibility and ease of use. But running WordPress on shared hosting often leads to slow performance, security risks, and scalability issues.
That’s where VPS hosting comes in. In this post, we’ll compare how VPS hosting improves speed and security for WordPress—and why Hosteons VPS is the right fit.
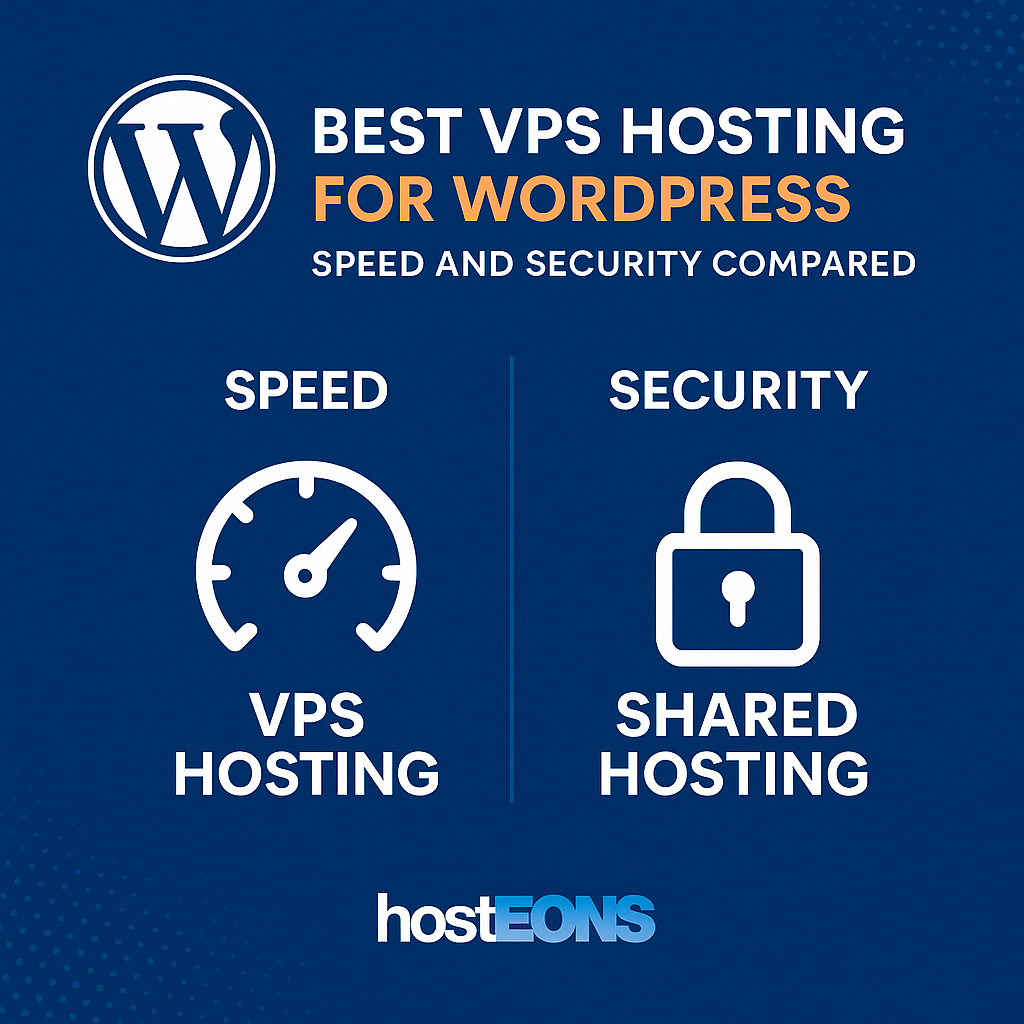
⚡ Speed: Why VPS Outperforms Shared Hosting
WordPress websites are resource-intensive. Themes, plugins, and database queries can quickly overwhelm limited shared hosting resources. VPS hosting changes the game:
✅ Dedicated Resources
Unlike shared hosting, a VPS provides dedicated CPU, RAM, and NVMe SSD storage. This means your WordPress site won’t slow down because of other users.
✅ NVMe SSD for WordPress
At Hosteons, our VPS plans use pure NVMe SSD storage. This results in:
- 🚀 Faster page load times
- 📊 Better database query performance
- 🛒 Improved checkout experience for e-commerce stores
✅ 10Gbps Network Uplink
Speed isn’t just about storage—it’s also about network capacity. Hosteons provides a 10Gbps uplink, ensuring your WordPress site stays fast even under traffic spikes.
🔒 Security: Protecting WordPress Sites on VPS
WordPress is the most popular CMS, which makes it a common target for hackers. VPS hosting provides multiple layers of security:
✅ Isolation from Other Users
On shared hosting, one compromised site can affect others. VPS hosting isolates your environment, reducing this risk.
✅ Firewall & Malware Protection
With a VPS, you can configure firewalls, install malware scanners, and harden WordPress security without restrictions.
✅ Backups & Recovery
Hosteons VPS customers can set up regular backups—critical for recovering from malware or accidental data loss.
✅ Fail2Ban & Security Tools
Tools like Fail2Ban, CSF, and WAF can be easily added to your VPS, giving stronger security than shared environments.
🆚 VPS vs Shared Hosting for WordPress
| Feature | Shared Hosting | VPS Hosting |
|---|---|---|
| Speed | Slows under load | Fast, consistent |
| Resources | Shared with others | Dedicated CPU, RAM, NVMe |
| Network Uplink | 1Gbps or less | 10Gbps uplink |
| Security | Risk from neighbors | Isolated + customizable |
| Flexibility | Limited control | Full root access |
| Best for | Hobby blogs | Businesses, e-commerce, agencies |
🌐 Why Hosteons VPS for WordPress?
At Hosteons, we provide VPS hosting that’s optimized for performance and flexibility:
- ⚡ NVMe SSD storage for fast load times
- 🌐 10Gbps uplinks for smooth traffic handling
- 🔒 Full control for security hardening
- 💳 Pay your way: 100+ global/local methods + crypto
- 💸 Affordable pricing with flexible billing cycles
👉 Check VPS plans: https://hosteons.com
👉 Order now: https://my.hosteons.com
🎯 Final Thoughts
If you run WordPress and care about speed and security, a VPS is a must. Shared hosting might work for small hobby blogs, but for serious projects, VPS hosting ensures consistent performance, stronger security, and the flexibility to grow.
With Hosteons VPS, you get the best of both worlds—budget-friendly pricing with enterprise-grade performance.